Glove detection using YOLOv8
- Published on
- • 4 mins read•––– views
YOLOv8 is used for a wide range of object detection and tracking, instance segmentation, image classification and pose estimation tasks. YOLOv8 offers a powerful feature known as predict mode that is tailored for high-performance, real-time inference on a wide range of data sources. In this experiment we will try to train YOLOv8 model(yolov8n.pt) to detect wether someone is using glove or not. We also use google colab as our platform today. So, let's jump in!
1. Gather dataset
Keep in mind that gathering and labeling dataset IS REALLY HARD. So, today instead of gather it manual and even annotate it manual, we will use Roboflow.
What is Roboflow?
"Roboflow empowers developers to build their own computer vision applications, no matter their skillset or experience. We streamline the process between labeling your data and training your model." In simple word, it is a tool to labeling your data faster. If you want to learn more about it, you can visit their website.
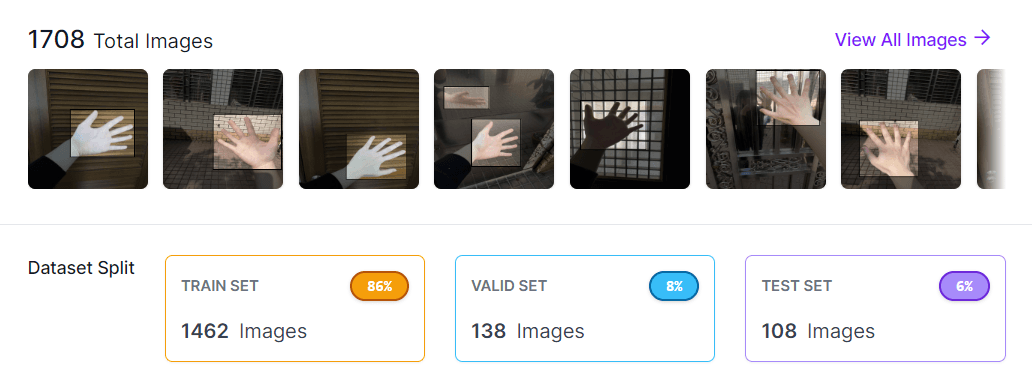
The picture above is how our dataset looks like. It has 1708 picture and 2 class (glove and no_glove). Sorry, but the current dataset is still private, you can check Roboflow to get the similar dataset as mine.
2. Prepare the Image
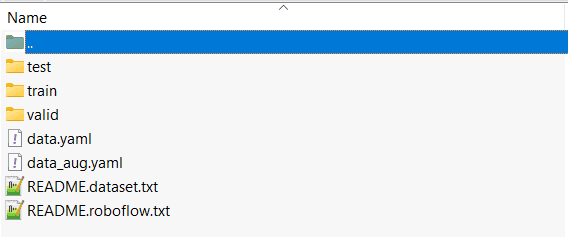
It is just one of many way to zip your dataset. Your dataset should look like the picture above. It is important for you to understand what is the supported structure of dataset in YOLOv8. If you want to learn more on how to labeling data in YOLOv8 you can visit this article.
import zipfile
with zipfile.ZipFile("data2.zip","r") as zip_ref:
    zip_ref.extractall()
3. Install Ultralytics
%pip install ultralytics
import ultralytics
ultralytics.checks()

4. Train
Now here is the train part. After read many journals, for this experiment, we will try to use data augmentation to train our model. Below is how we want our training part run. The Mosaic is turned off during the last 10 epochs of model training, allowing the model to complete its final convergence on a dataset of uncropped images to mitigate the potential drawbacks of the Mosaic data augmentation method.
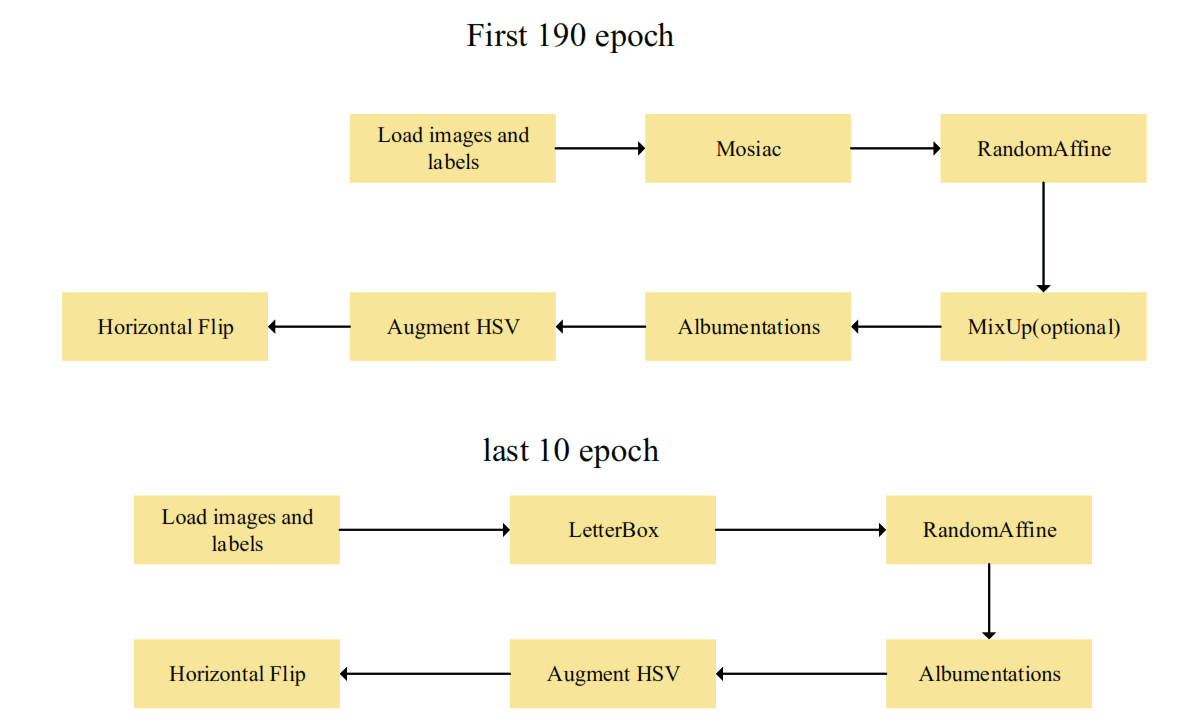
Source : Shichu Li
Augmentation Formula
Now to make a formula on how do you want your augmentation to be, you can just edit data.yaml in your dataset.
augment: true
augmentation_mosaic: 0.6
augmentation_copy_paste: 0.2  # Copy-Paste augmentation probability
augmentation_hflip: 0.5  # Horizontal flip augmentation probability
augmentation_vflip: 0.3  # Vertical flip augmentation probability
augmentation_rotate: 0.6  # Rotation augmentation probability
Train Syntax
!yolo task=detect mode=train model=yolov8n.pt data=data_aug.yaml epochs=200 imgsz=512 batch=16 workers=8 augment=True device=cuda conf=0.3
The purpose of this command is to detect glove using YOLO from our picture. Here is a little bit of the explanation.
- conf : Sets the minimum confidence threshold for detections. Objects detected with confidence below this threshold will be disregarded.
- imgsz : Specifies the size of all image. Which in this case we use 512x512 px. More pixel means more accurate but slow train.
- Other part is i think a bit self-explaining.
You can read what other argument does or improvise according to your needs on Ultralytics Documentation.
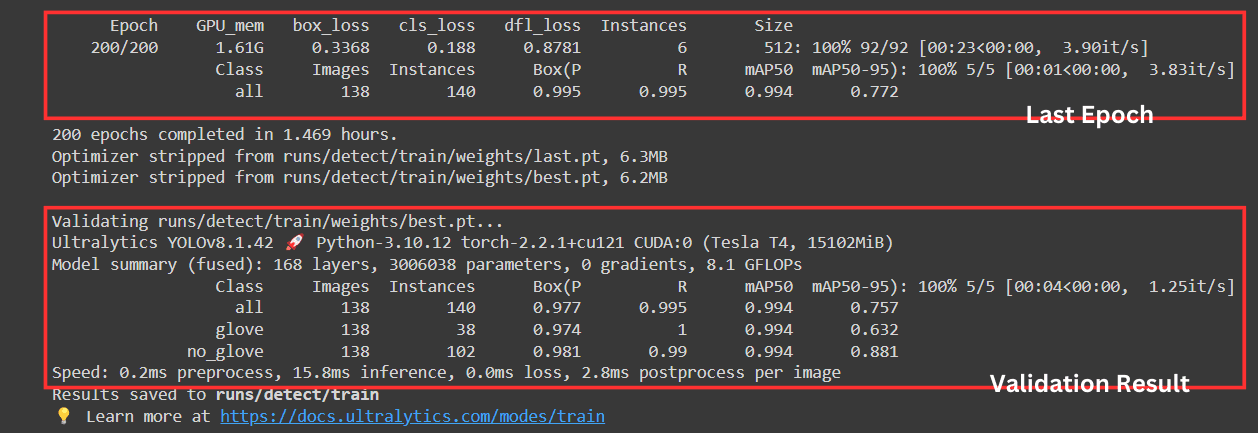
We can see we get a "not bad" result from the train. the cls_loss is 0.188 which we can say a high accuracy (low loss). But the most important part is mAP50 and mAP50-95. Here is some explanation
- mAP50: This metric represents the mean Average Precision at an IoU threshold of 0.5. Our model achieved an mAP50 of 0.993, which is very good.
- mAP50-95: This metric represents the mean Average Precision averaged across different IoU thresholds from 0.5 to 0.95 with a step size of 0.05. Our model achieved an mAP50-95 of 0.755, which is also a decent score.
5. Predict
!yolo task=detect mode=predict model=runs/detect/train/weights/best.pt data=data_aug.yaml source=1.jpg
You can change the source depending on your needs. In this case, i use my own example picture.
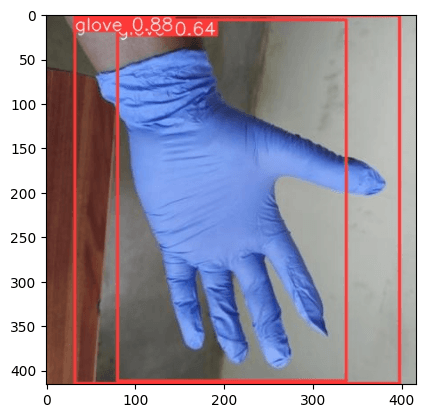
6. Show the Result
from matplotlib import pyplot as plt
import cv2

img = cv2.imread('runs/detect/predict4/1.jpg')
img_rgb = cv2.cvtColor(img, cv2.COLOR_BGR2RGB)

plt.imshow(img_rgb)
plt.show()
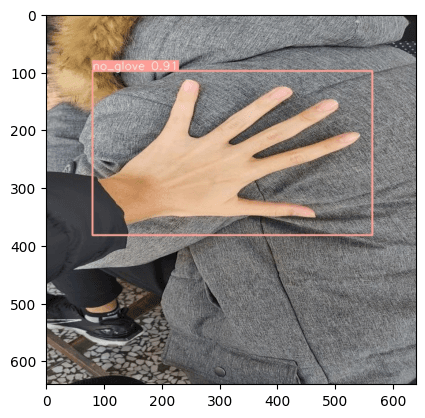
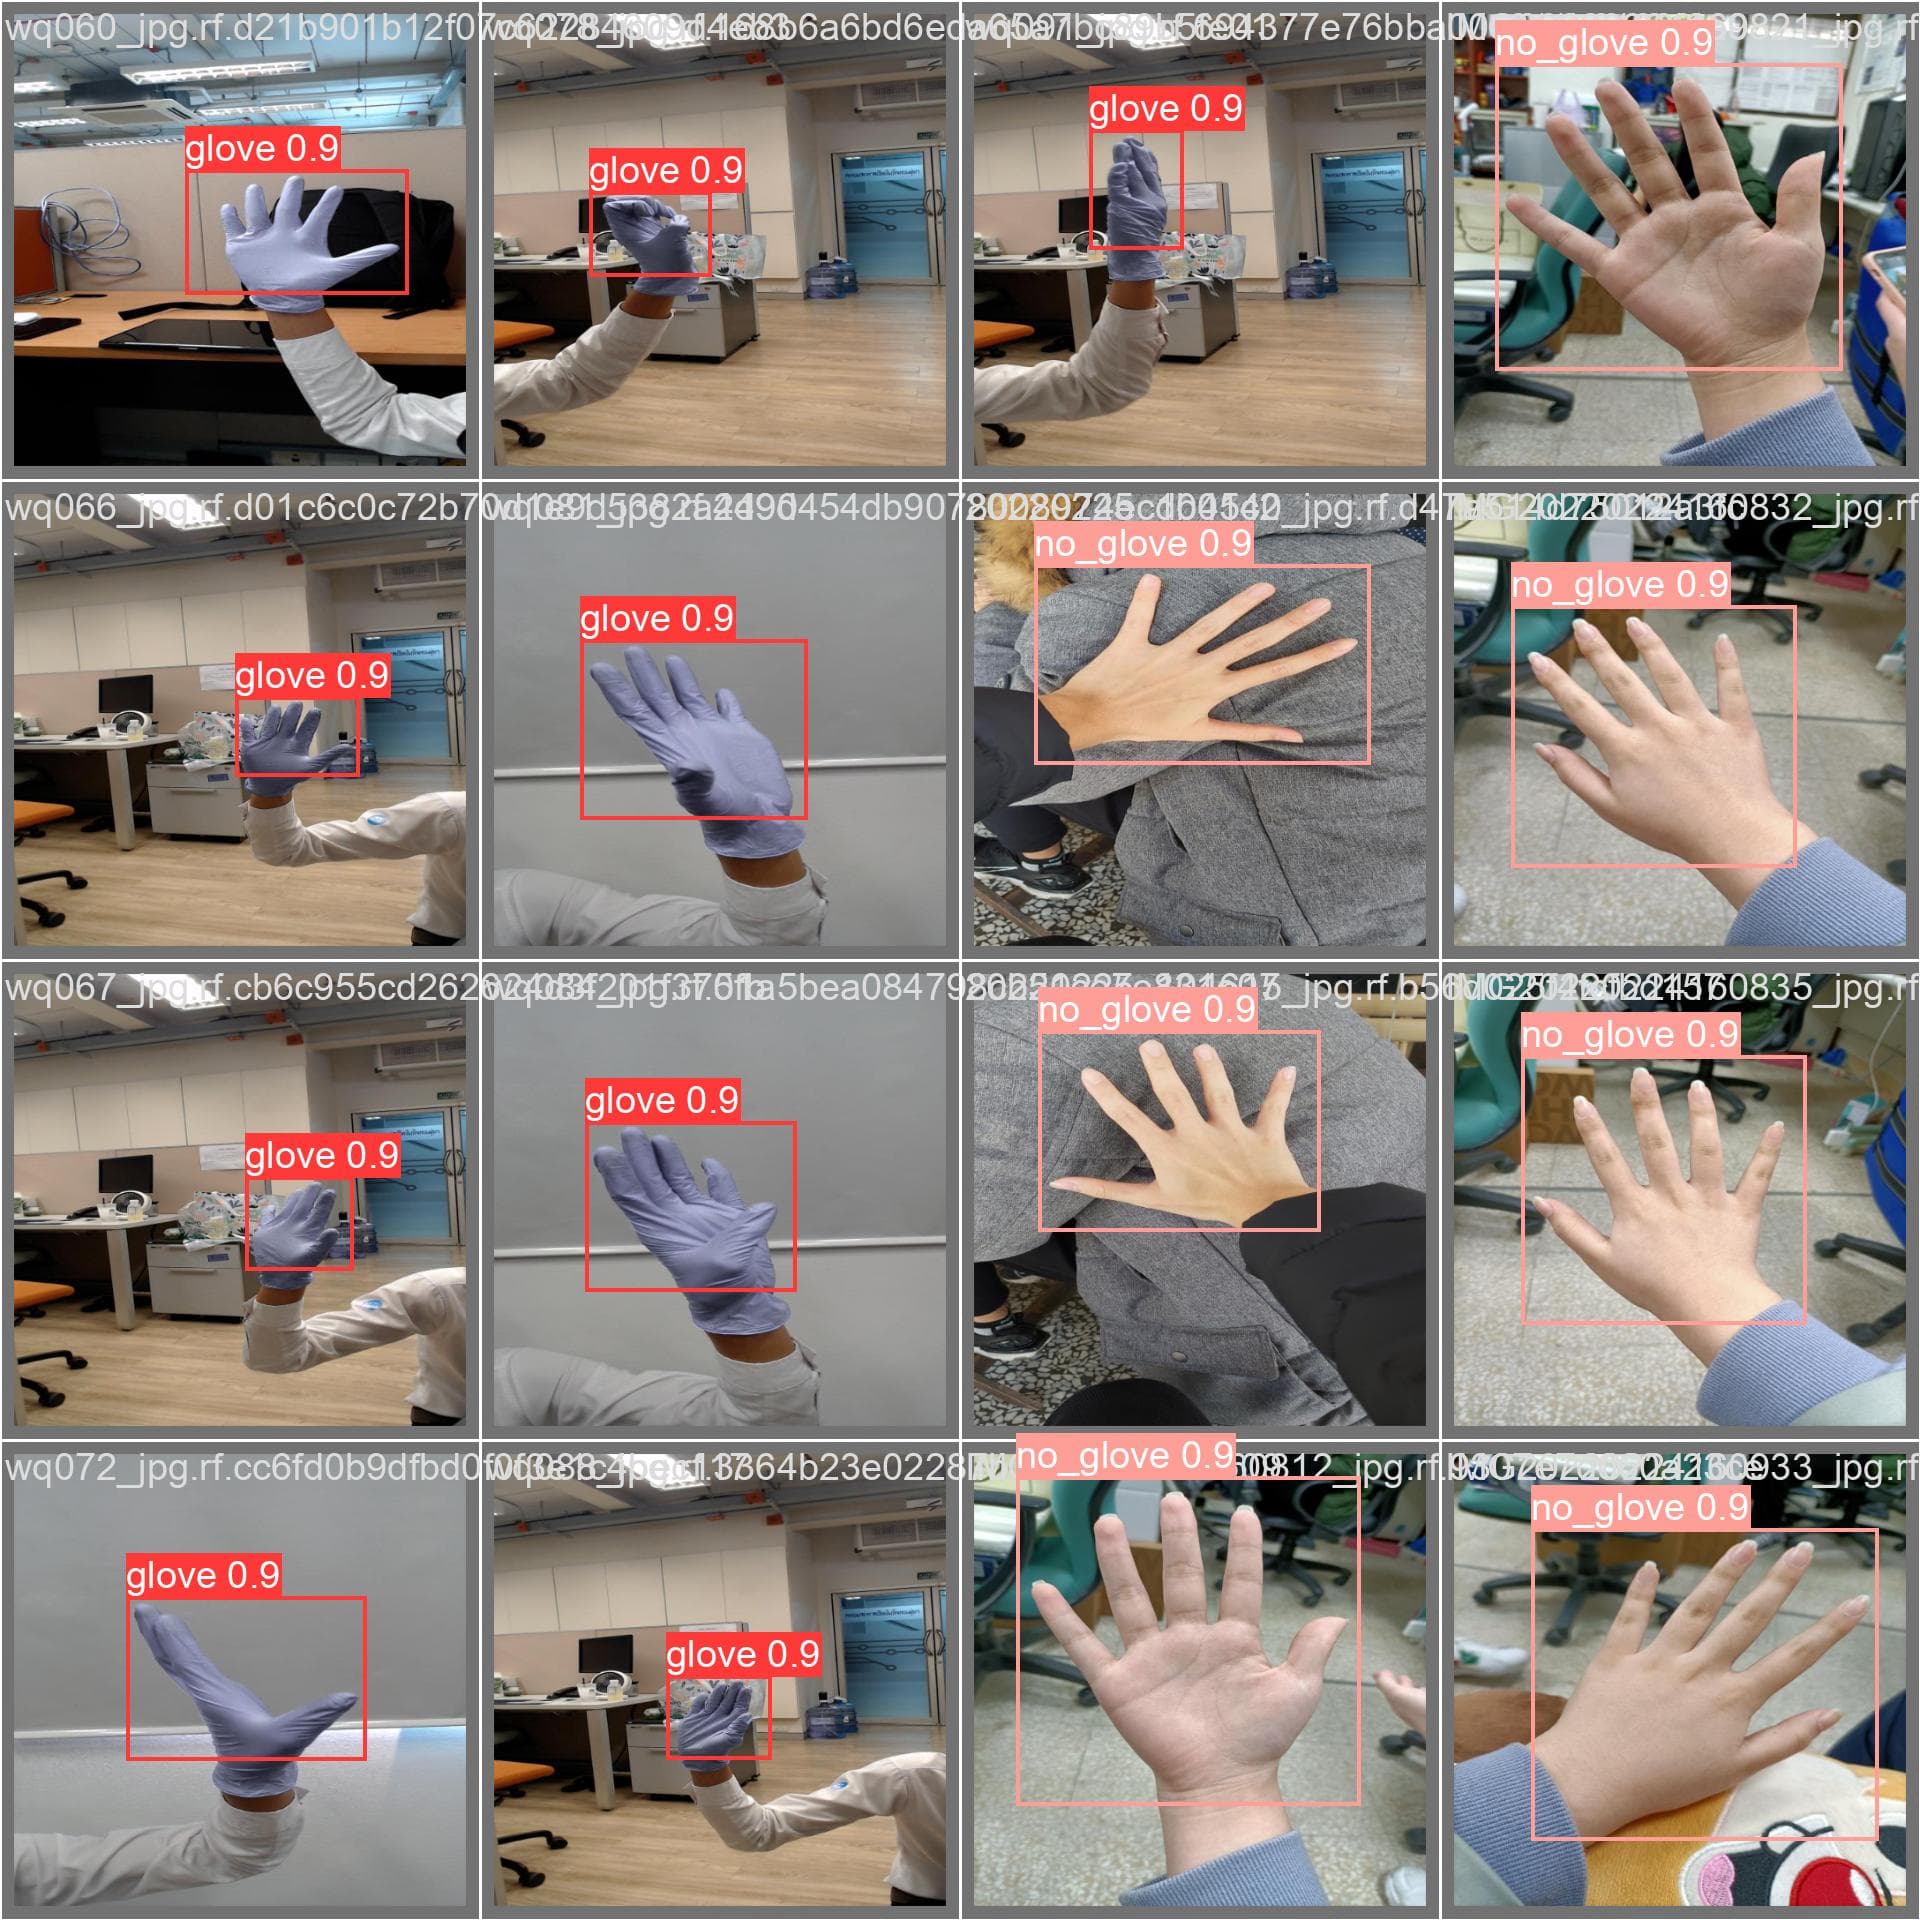
Your output now should look like the picture above.
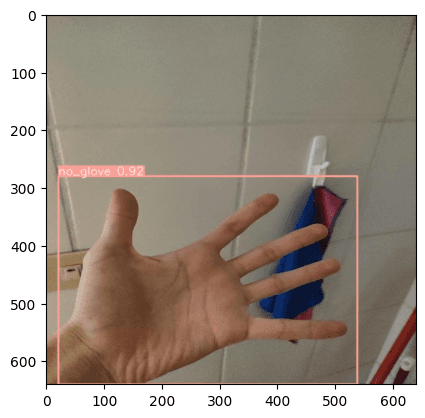
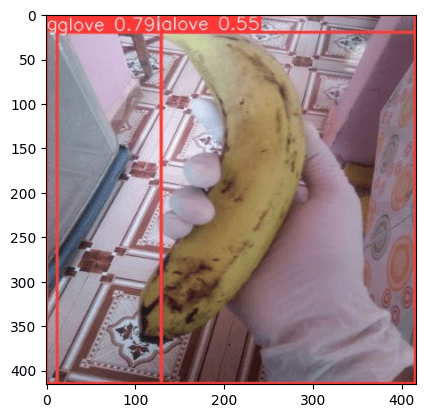
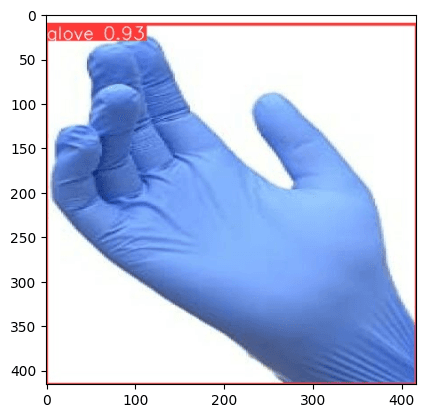
Another Example
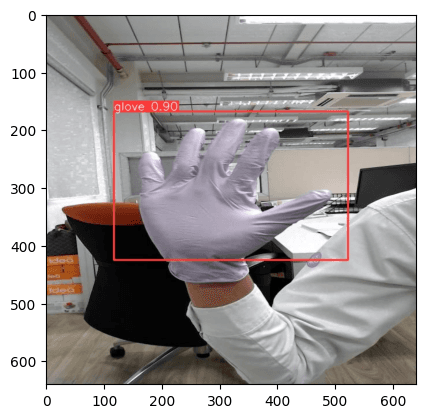
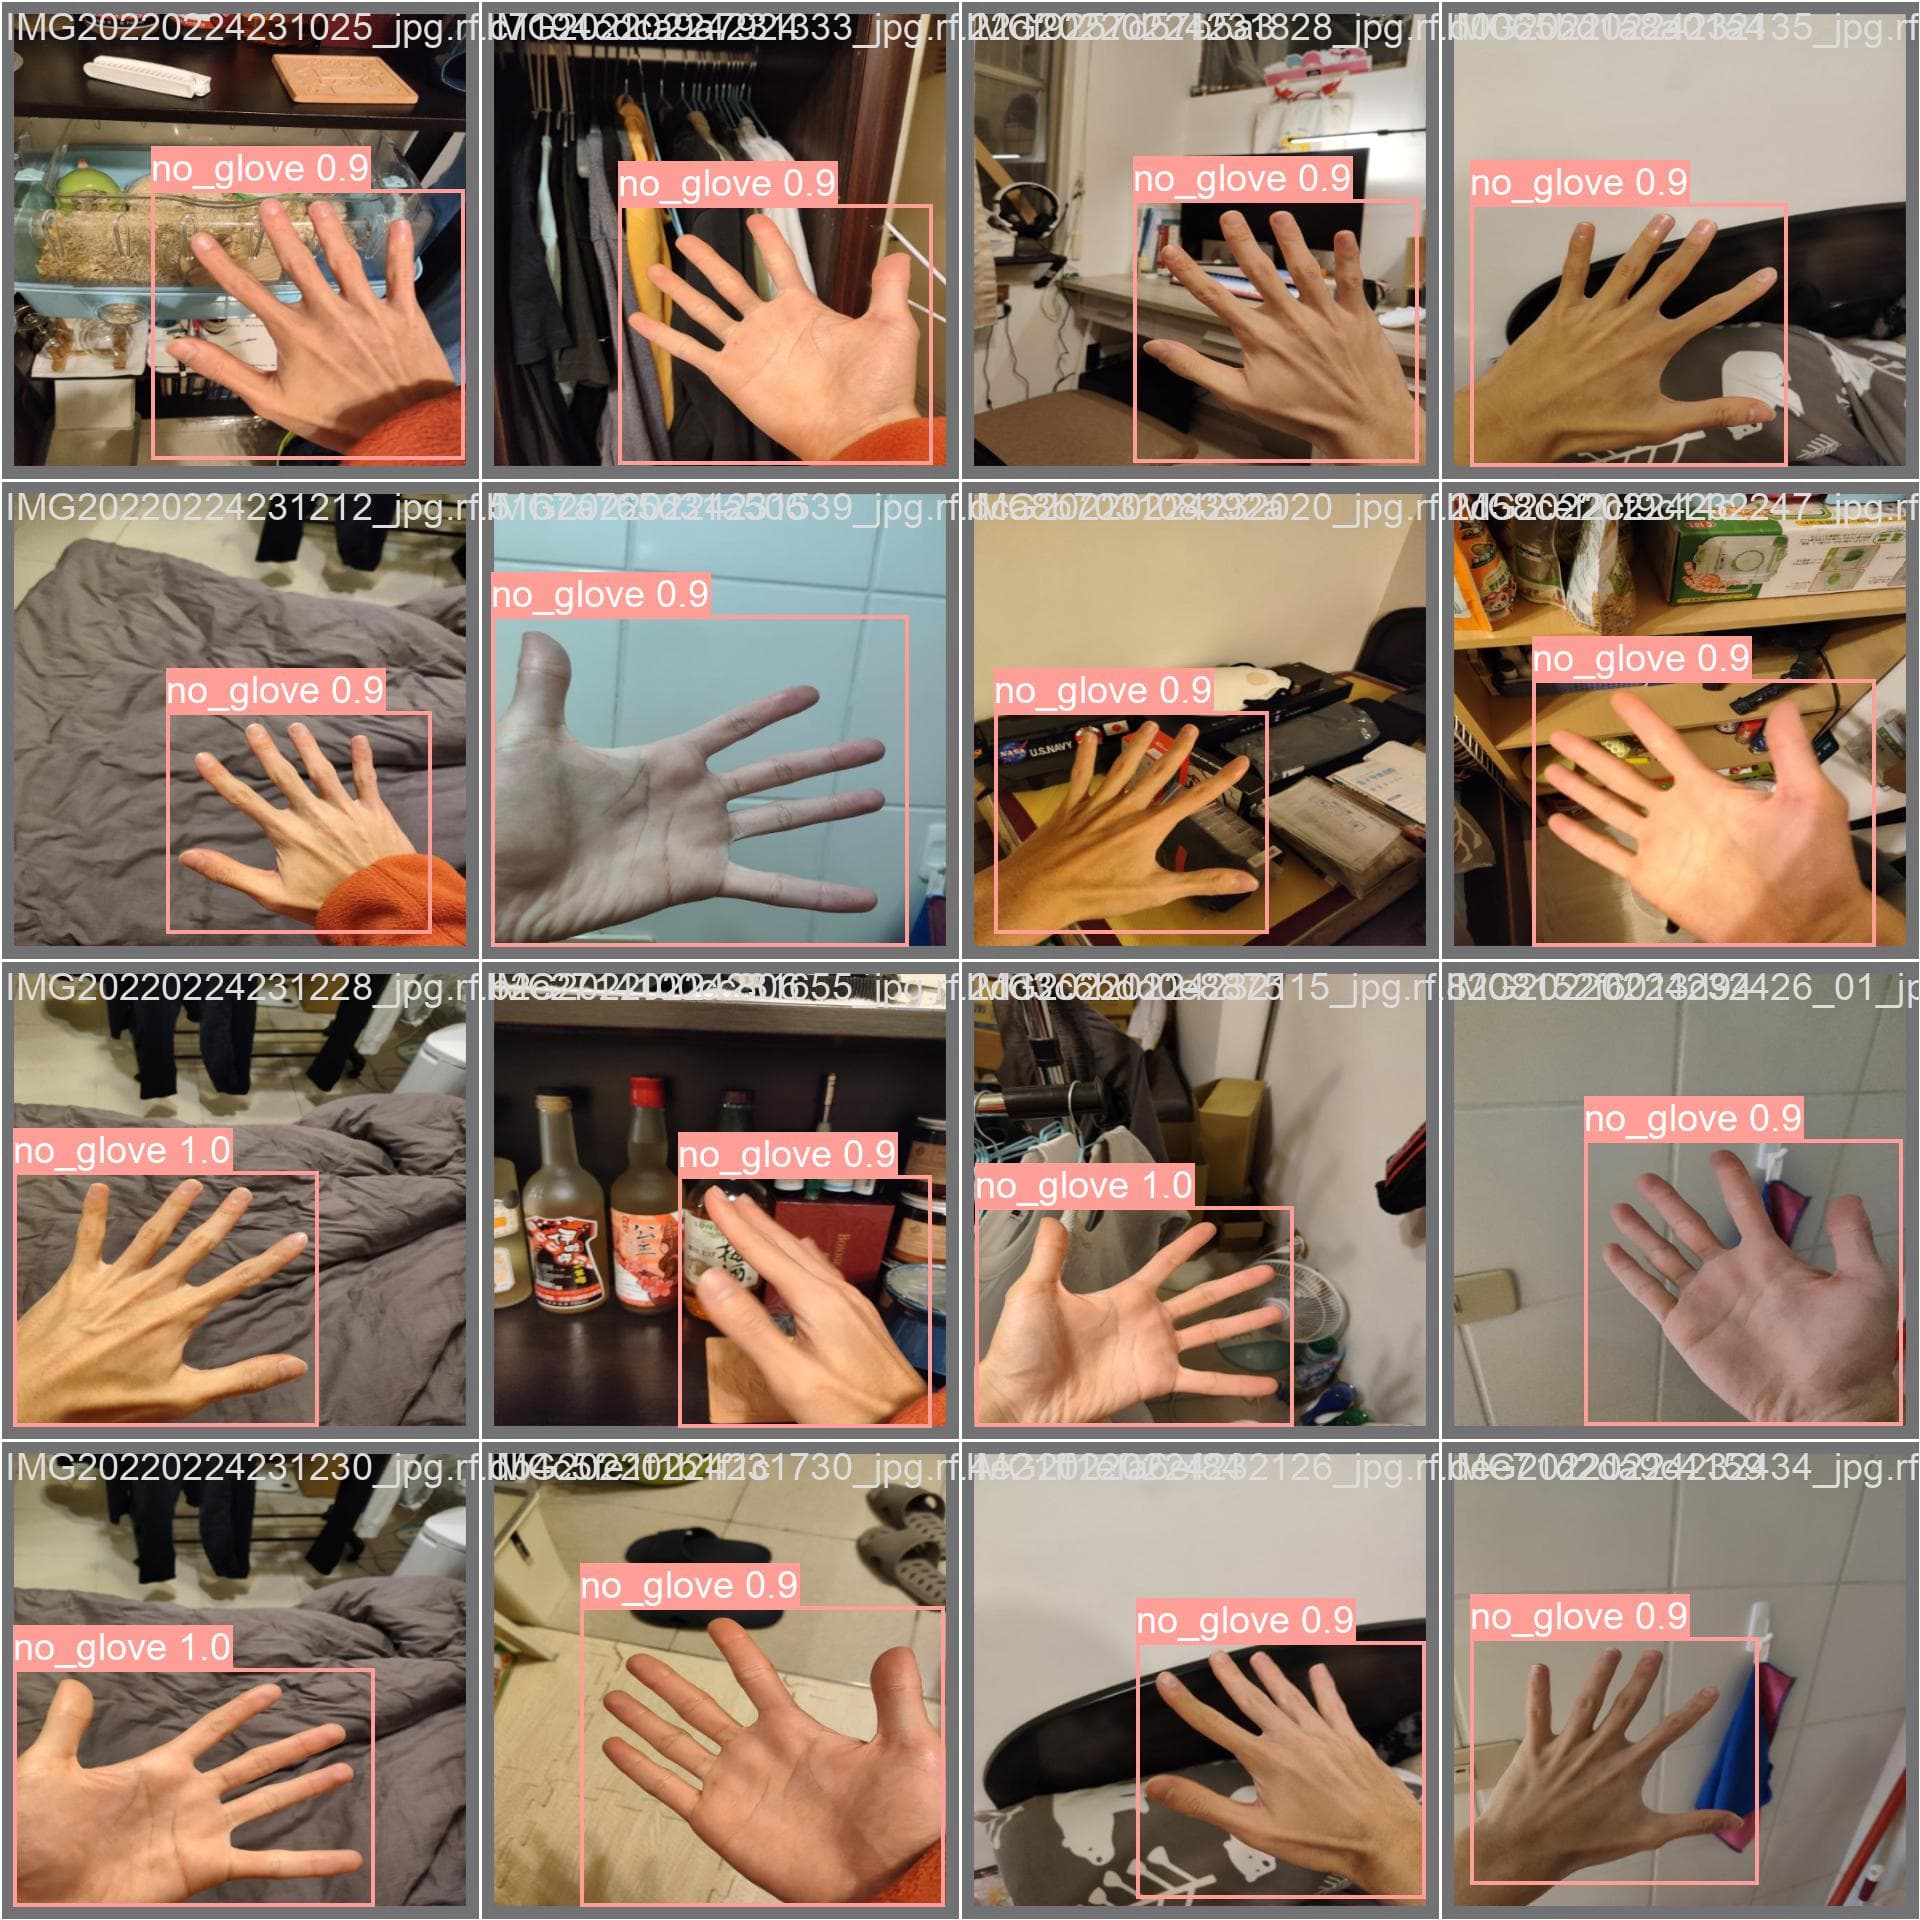
Data Validation
Label
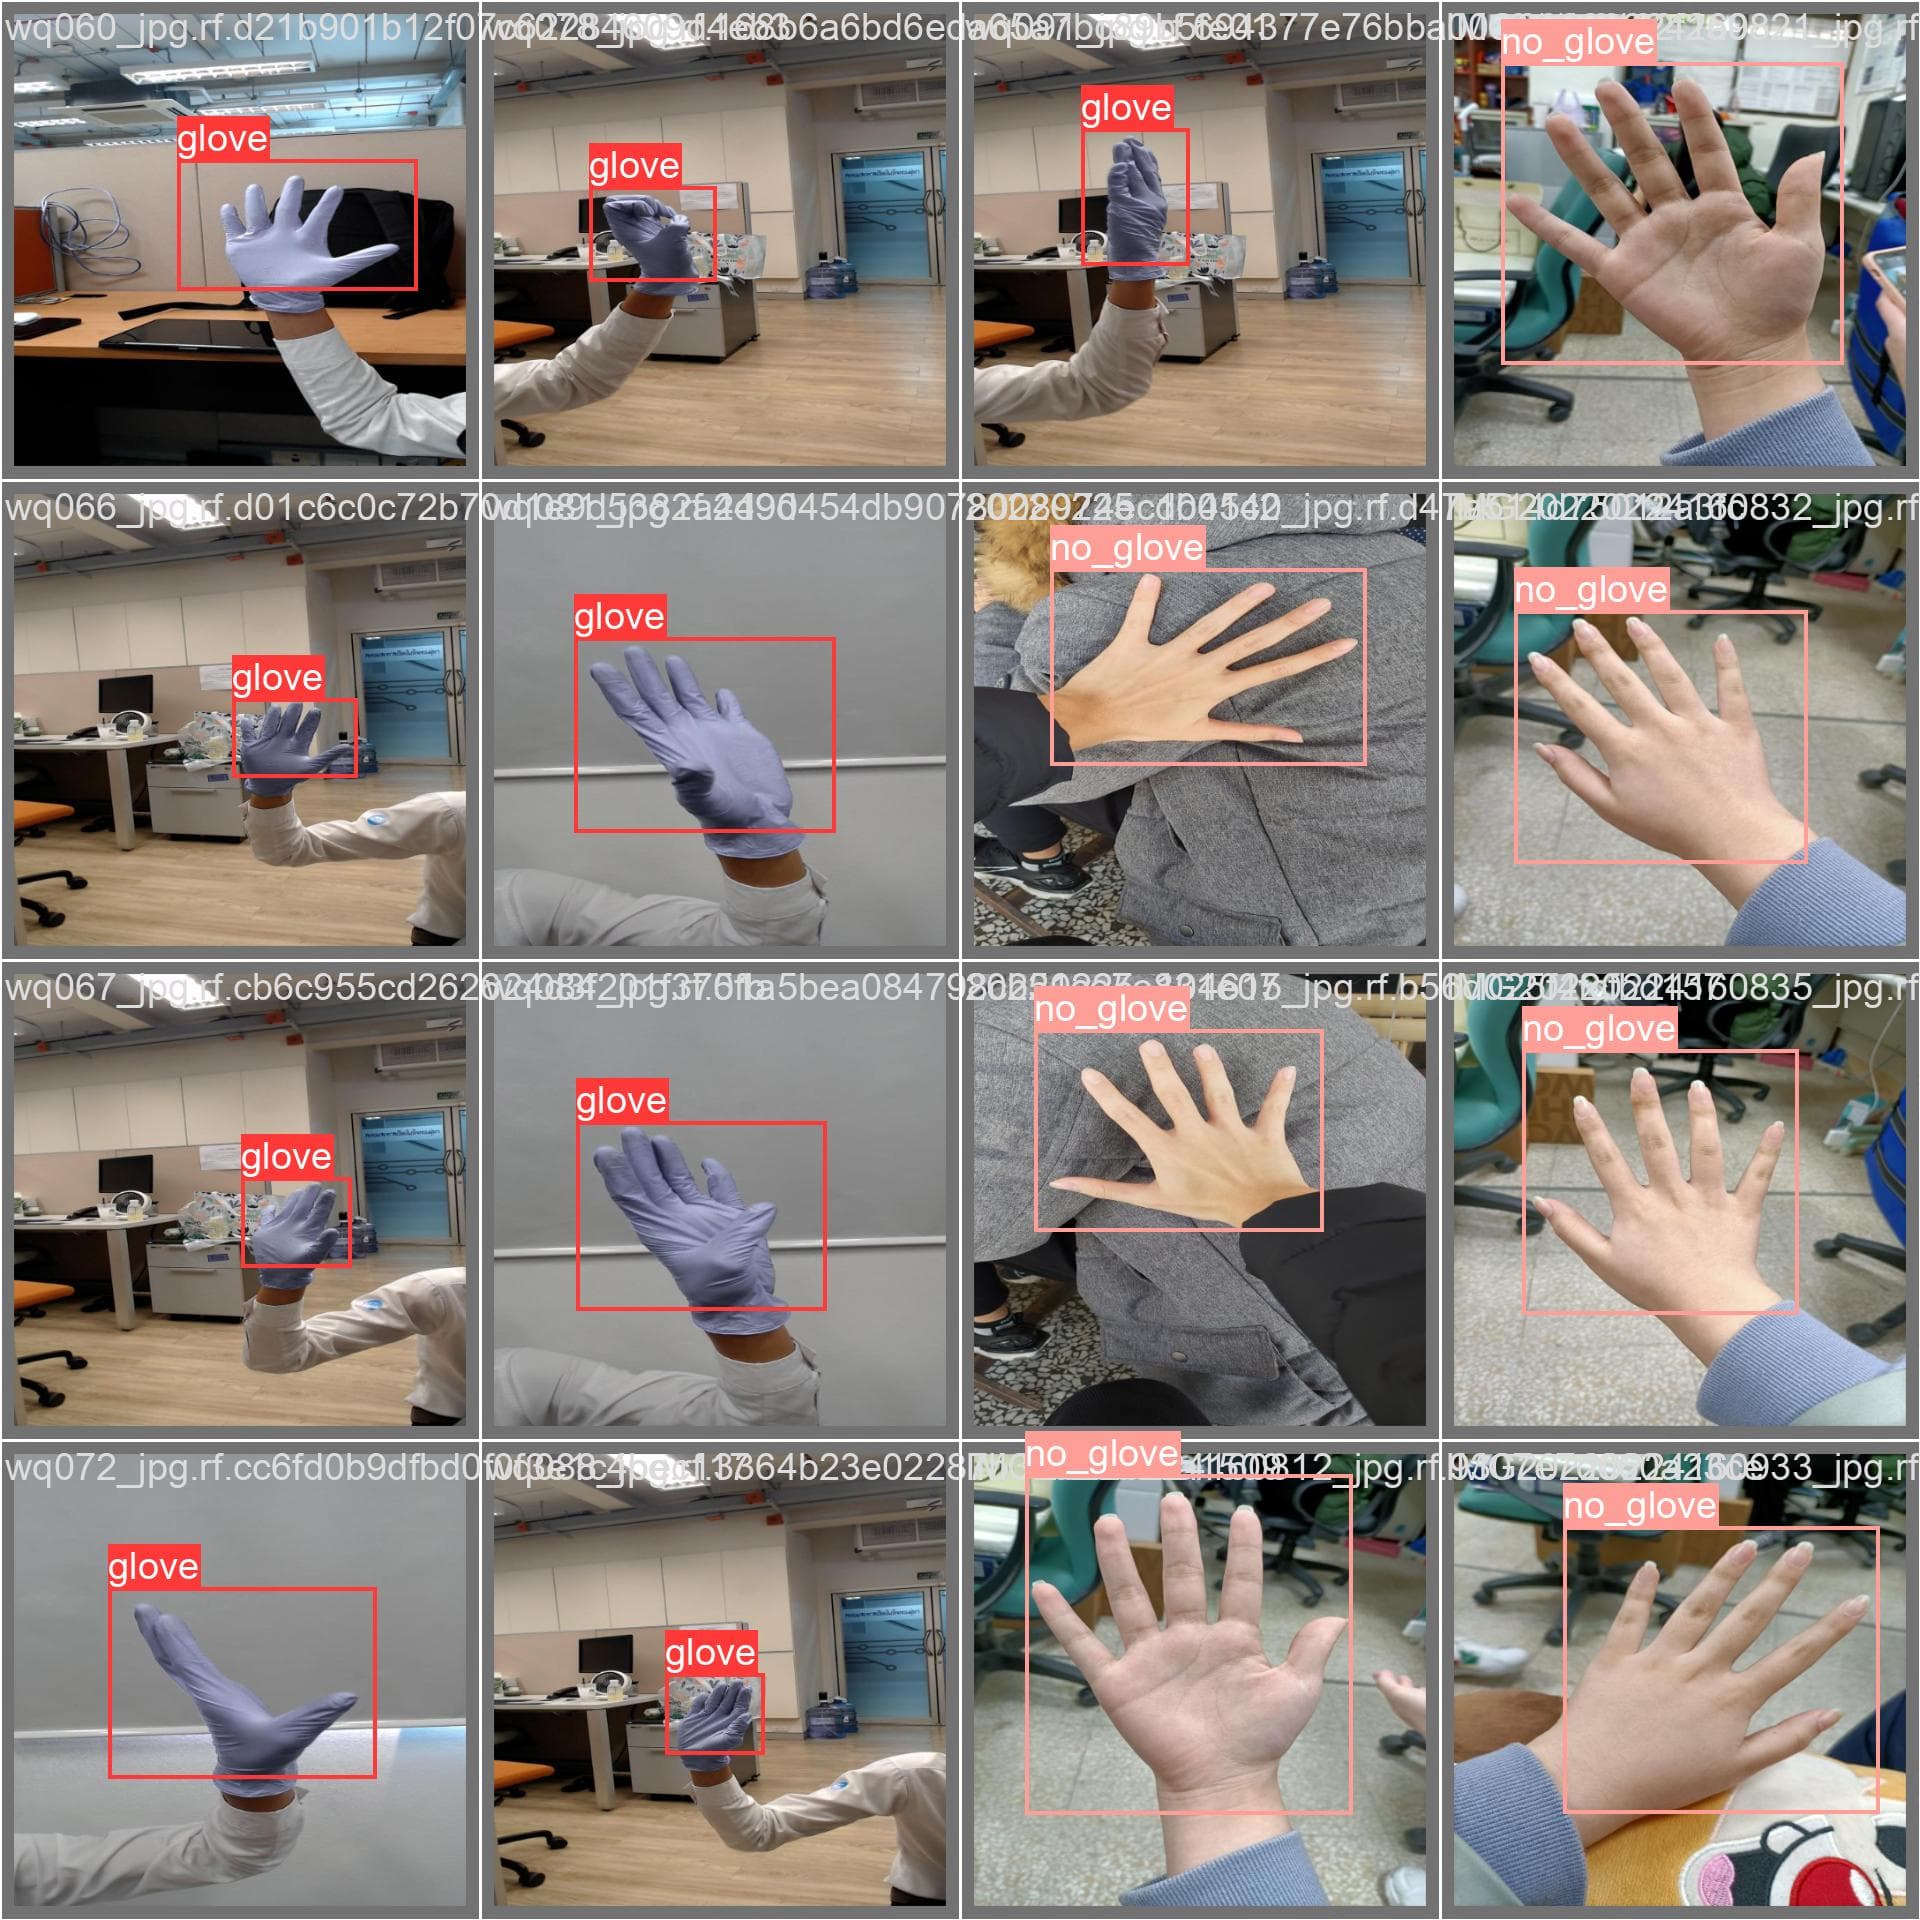
Prediction
Label
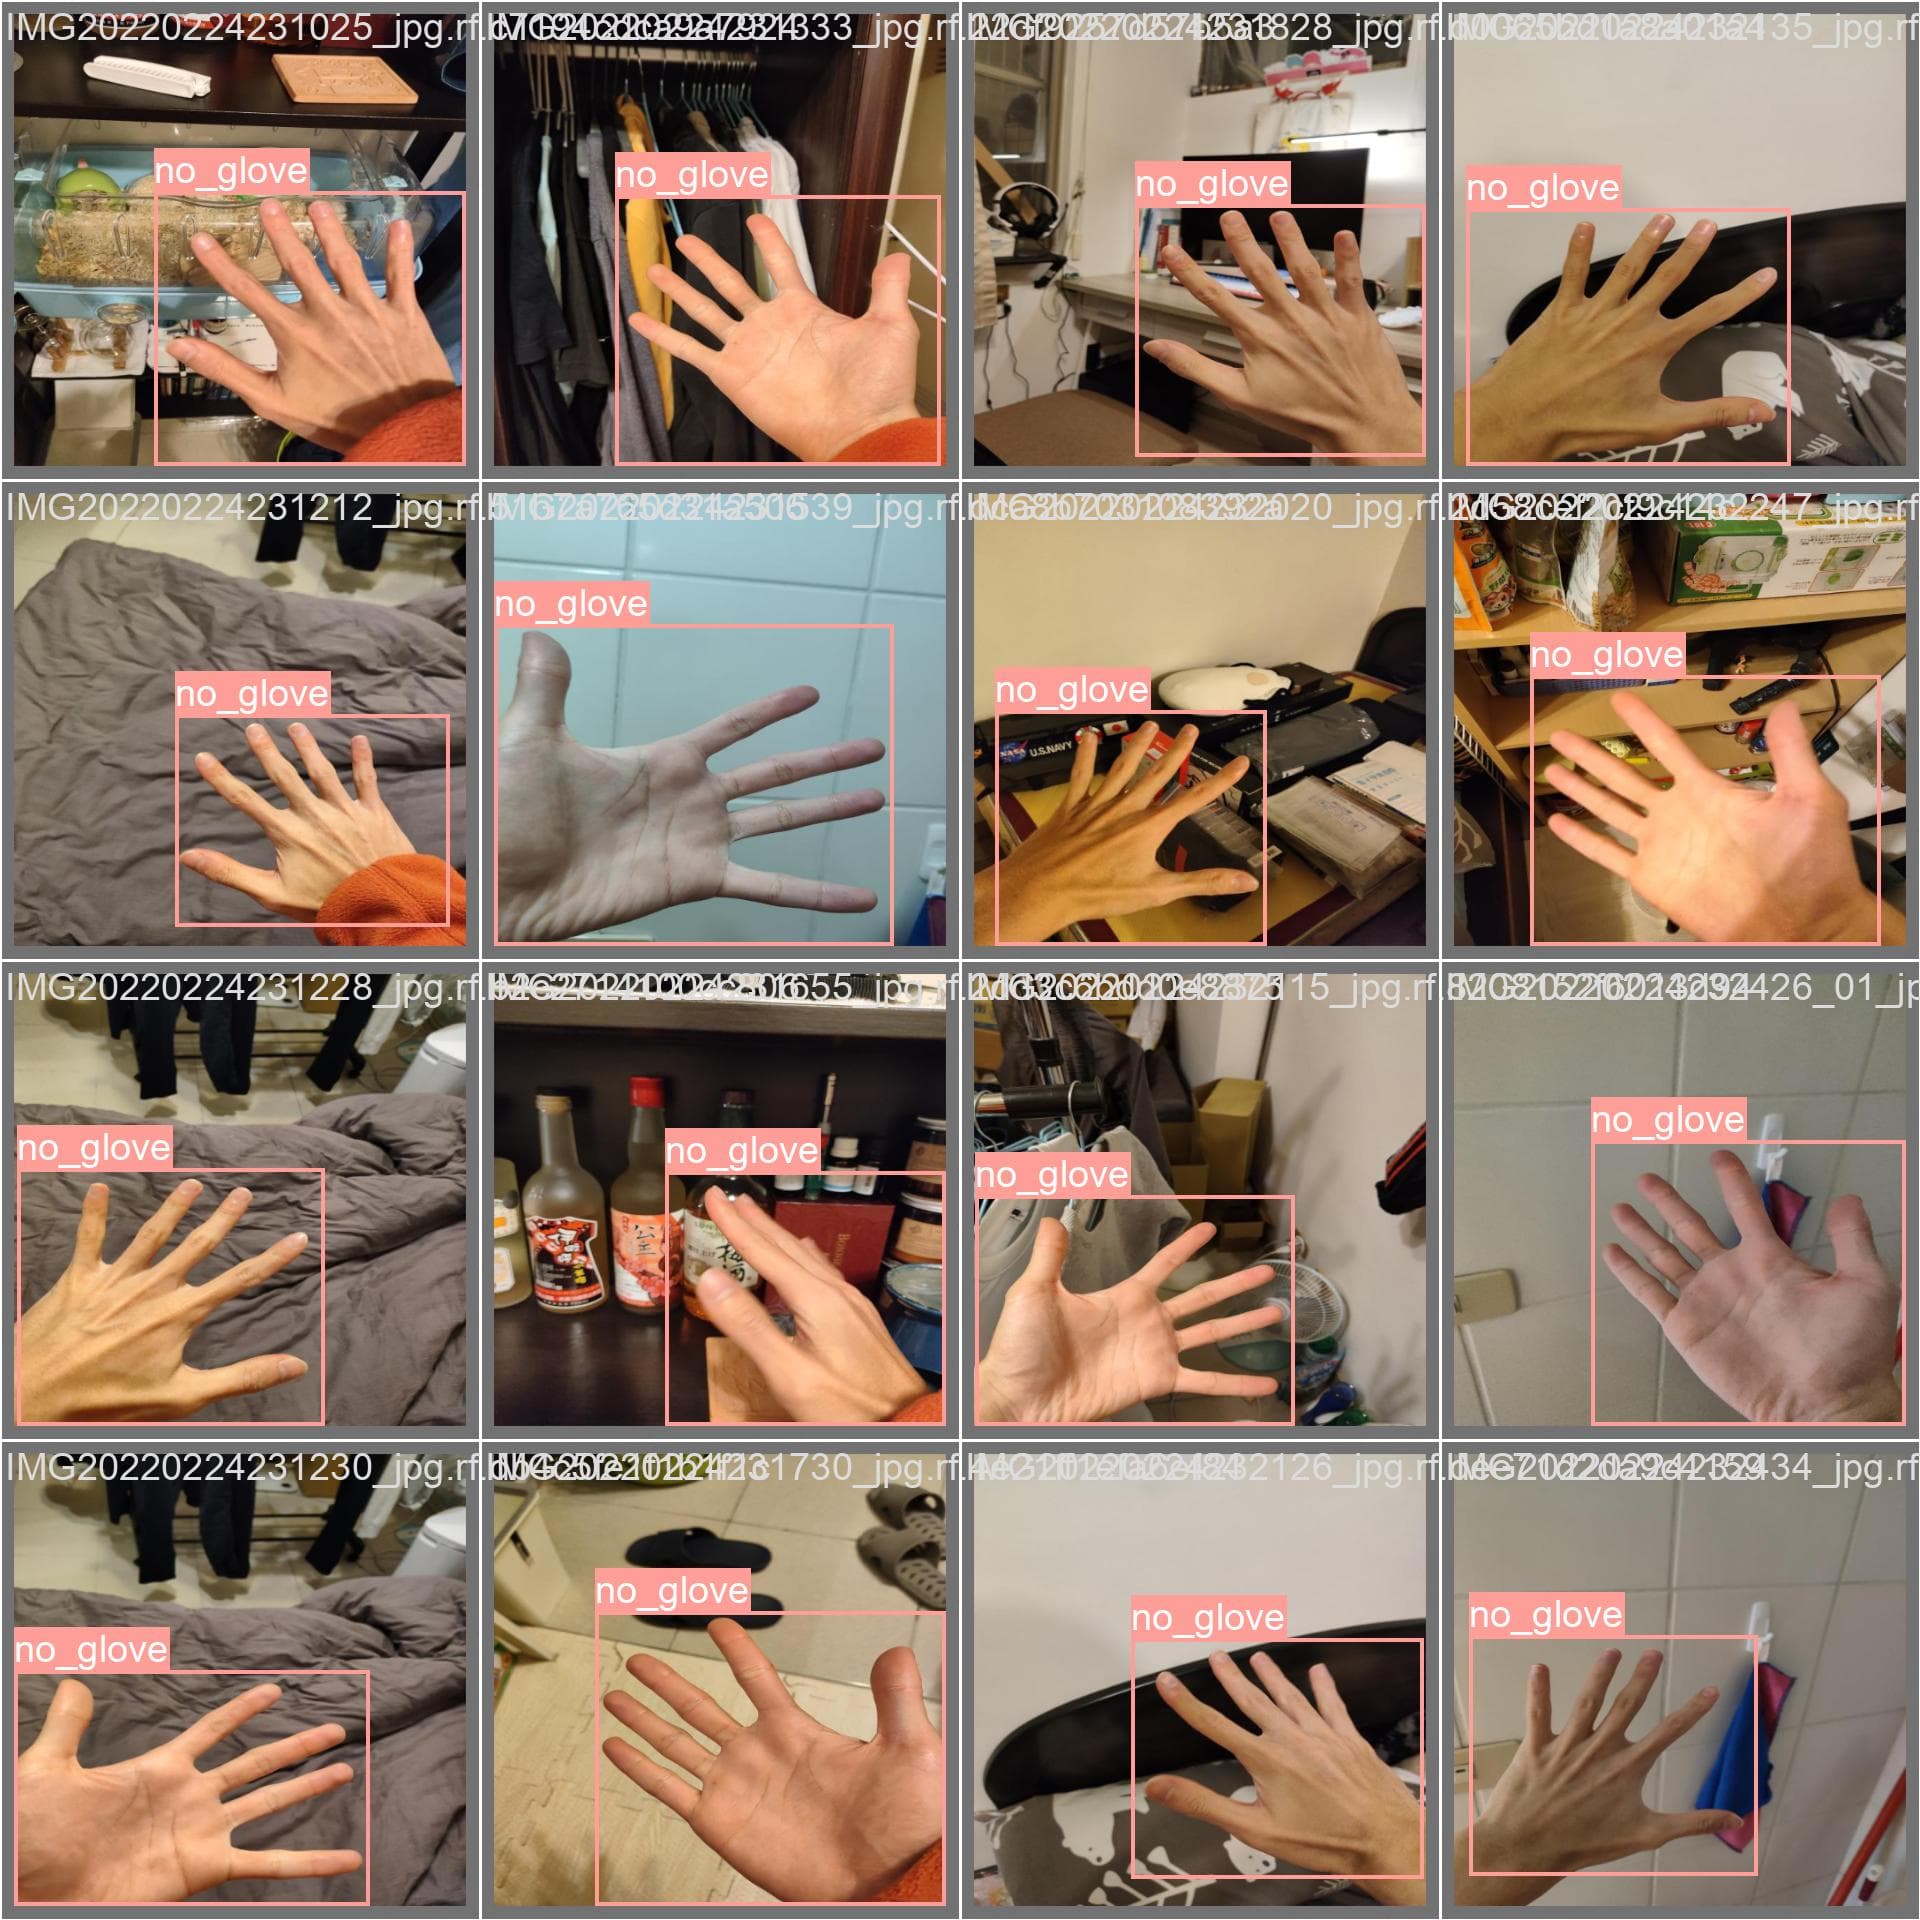
Prediction
References
- Ultralytics Documentation
- YOLOv8 Github
- Roboflow Documentation
- A Glove-wearing Detection Algorithm Based on Improved YOLOv8
Happy DLearn-ing!